
The Rapitest Soil Test Kit is a user-friendly tool designed to help gardeners measure soil pH and nutrient levels‚ providing essential insights for optimizing plant growth and soil health.
What is the Rapitest Soil Test Kit?
The Rapitest Soil Test Kit is a convenient‚ DIY tool designed to help gardeners measure soil pH and nutrient levels‚ including nitrogen‚ phosphorus‚ and potassium. It includes color comparators‚ testing devices‚ and a pH preference list to ensure accurate results. The kit is user-friendly‚ with clear instructions for collecting samples and performing tests. It provides essential data to identify soil deficiencies and guide amendments‚ making it a valuable resource for gardeners of all skill levels. The kit is cost-effective and easy to use‚ offering a practical alternative to professional soil testing. Its compact design and comprehensive components make it ideal for optimizing soil health and promoting plant growth.
Why Soil Testing is Important for Gardeners
Soil testing is crucial for gardeners as it reveals the composition and health of the soil‚ ensuring optimal growing conditions for plants. By identifying pH levels and nutrient content‚ gardeners can make informed decisions about fertilizers and amendments. Soil testing prevents over-fertilization‚ which can harm plants and the environment‚ while also addressing deficiencies that limit growth. It allows gardeners to tailor their strategies to specific soil needs‚ promoting healthier plants and higher yields. Regular testing fosters sustainable gardening practices by maintaining soil balance and supporting long-term ecosystem health. The insights gained from soil testing empower gardeners to create a thriving and resilient garden ecosystem.
Understanding the Components of the Rapitest Soil Test Kit
The Rapitest Soil Test Kit includes color comparators‚ a pH preference list‚ and testing devices for N‚ P‚ K‚ along with detailed instructions for accurate soil analysis.
What’s Included in the Kit
The Rapitest Soil Test Kit includes components for testing soil pH‚ Nitrogen (N)‚ Phosphorus (P)‚ and Potassium (K)‚ each with 20 tests‚ totaling 80 tests. It features color comparators for visual results‚ a pH preference list‚ and detailed instructions. The kit is packaged in a durable plastic case for convenient storage and organization‚ ensuring all components are easily accessible. This comprehensive setup allows gardeners to assess soil health accurately and make informed decisions for optimal plant growth.
The Role of Color Comparators in Soil Testing
Color comparators are essential tools in the Rapitest Soil Test Kit‚ enabling gardeners to visually determine soil nutrient levels and pH. Each comparator corresponds to a specific nutrient (pH‚ Nitrogen‚ Phosphorus‚ Potassium) and uses color changes to indicate test results. By comparing the color of the test solution to the chart provided‚ users can accurately assess soil conditions. These comparators simplify the testing process‚ eliminating the need for complex equipment. Their design ensures that even gardeners with limited experience can achieve reliable results‚ making soil testing accessible and straightforward. This visual method is a key feature of the kit‚ providing clear and quick insights into soil health and nutrient availability.
Purpose of the pH Preference List
The pH Preference List included in the Rapitest Soil Test Kit is a vital resource for gardeners‚ offering a detailed guide to optimal pH ranges for various plants. This list helps users interpret soil test results by matching their specific pH readings to the preferred levels of different plants. By referencing this list‚ gardeners can determine whether their soil pH is suitable for the plants they wish to grow or if adjustments are needed. It ensures informed decision-making‚ allowing gardeners to create an environment that supports healthy plant growth and maximizes yield. The list is a practical tool for tailoring soil conditions to meet the unique needs of each plant‚ enhancing overall gardening success and productivity.
Step-by-Step Instructions for Using the Rapitest Soil Test Kit
The Rapitest Soil Test Kit provides a straightforward method to analyze soil pH and nutrient levels. Collect samples‚ prepare them‚ and perform tests following the kit’s instructions. Match results to the pH preference list and adjust soil conditions as needed for optimal plant growth.
How to Collect a Soil Sample
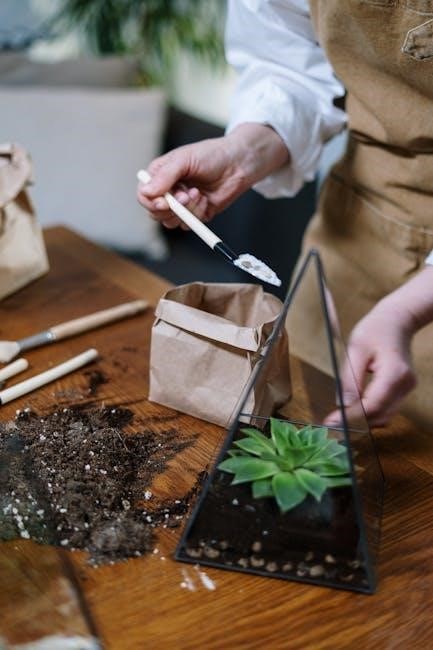
To collect a soil sample‚ dig 4-6 inches deep in your garden bed using a shovel or trowel. Scoop soil from multiple areas to ensure a representative sample. Mix the collected soil thoroughly in a clean container to combine different layers. Avoid using contaminated tools or adding water. If the soil is wet‚ let it air-dry before testing. For accuracy‚ take samples from several locations and mix them well. This method ensures reliable results for pH and nutrient testing. Proper sampling is crucial for understanding your soil’s condition and making informed adjustments for optimal plant growth.

Preparing the Soil Sample for Testing
After collecting the soil sample‚ spread it out on a clean‚ dry surface to air-dry completely. Once dry‚ crush any clumps to ensure uniformity. Sift the soil through a fine-mesh sieve to remove debris and large particles. Transfer about 1-2 tablespoons of the prepared soil to a clean container for testing. Avoid contamination by using a dry‚ clean tool and container. Properly prepared soil ensures accurate test results. Follow the kit’s instructions for specific measuring guidelines. This step is crucial for obtaining reliable data on pH and nutrient levels‚ enabling effective soil adjustments for healthier plant growth.
Conducting the pH Test
To conduct the pH test‚ mix 1 teaspoon of prepared soil with 1 tablespoon of distilled water in a clean container. Stir thoroughly to create a uniform mixture. Using the dropper provided‚ add 3-4 drops of the pH testing solution to the mixture. Stir gently and allow the solution to react for about 30 seconds. Observe the color change and compare it to the color comparator chart included in the kit. Match the color to determine the soil’s pH level; Refer to the pH preference list to understand optimal levels for your plants. This step is crucial for assessing soil acidity or alkalinity‚ which directly impacts nutrient availability and plant health. Ensure accuracy by following the kit’s instructions closely. Soil pH testing lays the foundation for all other nutrient assessments.
Performing the Nitrogen (N) Test
To perform the Nitrogen (N) test‚ mix 1 teaspoon of prepared soil with distilled water‚ following the kit’s instructions. Add the specified number of drops from the Nitrogen test solution to the mixture. Stir well and wait for the reaction. Compare the resulting color to the Nitrogen color comparator chart to determine the soil’s Nitrogen level. This step helps assess the availability of Nitrogen‚ essential for leaf growth and plant fertility. Accurate results depend on precise measurement and proper mixing. Use this data to decide if Nitrogen-rich fertilizers are needed to enhance soil fertility and promote healthy plant development. Always refer to the kit’s guidelines for best practices and reliable outcomes.
Performing the Phosphorus (P) Test
To perform the Phosphorus (P) test‚ measure 1 teaspoon of prepared soil and mix it with distilled water in a clean container‚ following the kit’s instructions. Add the specified number of drops from the Phosphorus test solution. Stir thoroughly and allow the mixture to react for the recommended time. Compare the resulting color to the Phosphorus color comparator chart to determine the soil’s Phosphorus level. Phosphorus is crucial for root development‚ flower production‚ and overall plant energy. Accurate test results help you identify if your soil has sufficient Phosphorus or if adjustments are needed. Use this information to apply the right fertilizers and optimize nutrient availability for your plants. Always follow the kit’s guidelines for precise results.
Performing the Potassium (K) Test
To perform the Potassium (K) test‚ measure 1 teaspoon of prepared soil and mix it with distilled water in a clean container. Add the required number of drops from the Potassium test solution as specified in the kit’s instructions. Stir well and allow the mixture to react for the recommended time. Compare the resulting color to the Potassium color comparator chart to determine the soil’s Potassium level. Potassium is essential for plant health‚ supporting overall vitality‚ resistance to disease‚ and water balance. Accurate test results help you assess whether your soil’s Potassium levels are adequate or if adjustments are necessary. Use this information to apply the appropriate fertilizers and ensure optimal nutrient availability for your plants. Always follow the kit’s guidelines for precise results.
Resetting the Soil Sample After Testing
After completing the tests‚ discard the soil and testing solution mixtures responsibly. Rinse any reusable components like testing devices or droppers with distilled water to ensure no residue remains. Allow these items to air dry before storing them in the kit. Properly dispose of any used capsules or materials to avoid contamination. Resetting the soil sample ensures accuracy in future tests by preventing cross-contamination. Clean and store all components in a dry place to maintain their effectiveness. This step is crucial for maintaining the integrity of the kit and ensuring reliable results in subsequent tests. Always follow the kit’s instructions for proper disposal and storage to prolong the life of your Rapitest Soil Test Kit. Regular maintenance helps preserve its accuracy and functionality.
Interpreting the Results
Compare test results to the color charts and numerical guides provided to determine pH‚ nitrogen‚ phosphorus‚ and potassium levels. Use the pH preference list to identify optimal ranges for your plants and guide soil amendments.
Understanding the Color Charts
The color charts provided with the Rapitest Soil Test Kit are essential tools for accurately interpreting test results. Each chart corresponds to a specific nutrient test—pH‚ nitrogen‚ phosphorus‚ and potassium—and displays a gradient of colors representing different levels. After performing a test‚ compare the color of the test solution to the chart to determine the nutrient level in your soil. The pH chart‚ for example‚ will show a range from acidic to alkaline‚ while the NPK charts will indicate low‚ medium‚ or high nutrient levels. These visual guides simplify the process of understanding your soil’s condition‚ enabling you to make informed decisions about amendments. Ensure accurate comparisons by using proper lighting and avoiding colorblindness issues. This step is crucial for achieving precise results and optimizing soil health for plant growth.
What Do the Numbers Mean?
The numbers derived from the Rapitest Soil Test Kit represent the levels of key soil components: pH‚ nitrogen (N)‚ phosphorus (P)‚ and potassium (K). The pH scale ranges from 0 to 14‚ with 7 being neutral‚ below 7 acidic‚ and above 7 alkaline. Nitrogen‚ phosphorus‚ and potassium levels are indicated by numerical values that correspond to low‚ medium‚ or high concentrations. These numbers help gardeners understand nutrient deficiencies or surpluses. By referencing the pH preference list‚ you can determine if your soil’s pH aligns with the needs of your plants. Matching these numerical results to the list enables targeted adjustments‚ such as adding fertilizers or lime‚ to create an optimal soil environment for healthy plant growth and maximum yield. Accurate interpretation ensures effective soil management.
Matching Results to the pH Preference List
After obtaining your soil test results‚ compare the pH level to the pH preference list provided with the Rapitest Soil Test Kit. This list outlines the optimal pH ranges for various plants. If your soil’s pH is within the recommended range for your plants‚ no adjustment is needed. If it’s too high or low‚ you’ll need to take action. For example‚ if your soil is too acidic‚ add lime to raise the pH. If it’s too alkaline‚ incorporate elemental sulfur or peat moss to lower it. Ensure to follow the kit’s instructions for any adjustments to achieve the ideal soil conditions for your plants. This process ensures your garden thrives with balanced soil chemistry.

Adjusting Your Soil Based on Test Results
Based on test results‚ adjust soil pH using lime or sulfur and modify nutrient levels with specific fertilizers to create optimal growing conditions for your plants.
How to Adjust Soil pH
If your soil pH is too low‚ add lime to raise it. If it’s too high‚ use sulfur or peat moss to lower it. Always follow the kit’s instructions for application rates based on test results. Different plants prefer different pH levels‚ so consult the included pH preference list to match your soil to plant needs. Apply amendments evenly and water thoroughly to help them take effect. Retest the soil after a few weeks to ensure adjustments are effective. Avoid overcorrection by making gradual changes and maintaining regular soil monitoring for optimal plant health.
Correcting Nitrogen Levels
If your soil test reveals low nitrogen levels‚ amend the soil with organic matter like compost or well-rotted manure. For quicker results‚ use nitrogen-rich fertilizers such as ammonium sulfate or urea‚ following the recommended application rates on the product label. Avoid over-fertilization‚ as excessive nitrogen can harm plants and leach into waterways. If nitrogen levels are too high‚ avoid adding nitrogen-based fertilizers and instead focus on balancing with phosphorus and potassium; Regular monitoring ensures optimal nutrient levels. Always refer to the pH preference list to align adjustments with plant-specific needs‚ promoting a balanced and thriving garden ecosystem;
Balancing Phosphorus in the Soil
Phosphorus is essential for plant root development‚ flower and fruit production‚ and energy transfer within plants. If your Rapitest Soil Test Kit indicates low phosphorus levels‚ address this by incorporating organic matter like rock phosphate or bone meal‚ which release nutrients gradually. For quicker results‚ use synthetic phosphorus-rich fertilizers‚ such as ammonium phosphate‚ following the recommended dosage. Avoid over-application‚ as excessive phosphorus can inhibit nutrient uptake and pollute waterways. If phosphorus levels are too high‚ refrain from adding more and focus on balancing with nitrogen and potassium. Regular soil testing ensures optimal levels‚ preventing deficiencies or overabundance. Always align adjustments with plant-specific needs for a healthy‚ productive garden.
Managing Potassium Levels

Potassium is crucial for plant health‚ aiding in disease resistance‚ water balance‚ and nutrient transport. If the Rapitest Soil Test Kit shows low potassium levels‚ apply organic matter like composted manure or green sand. Synthetic options‚ such as potassium sulfate or muriate of potash‚ are effective but should be used as directed to avoid over-application. High potassium levels can hinder nutrient absorption‚ so avoid adding more if levels are sufficient. Regular testing ensures balanced potassium‚ promoting robust plant growth and preventing deficiencies or toxicity. Adjustments should align with specific plant needs‚ as excessive potassium can disrupt soil health and nutrient availability. Maintain optimal levels to support overall soil fertility and plant vitality.

Maintaining Your Rapitest Soil Test Kit
Properly store the kit in a dry‚ cool place to preserve components. Clean testing devices with distilled water and replace expired or damaged parts to ensure accuracy.
Proper Storage of the Kit
Store the Rapitest Soil Test Kit in a cool‚ dry place away from direct sunlight to protect the components from moisture and heat. Ensure all testing devices and chemicals are securely sealed in their original packaging to maintain their effectiveness. Reseal test capsules tightly after use to prevent contamination and moisture exposure. Keep the color comparison charts clean and dry‚ as they are essential for accurate test results. By following these storage guidelines‚ you can ensure the kit remains functional and provides reliable soil testing results for future use. Proper storage also helps extend the lifespan of the kit‚ making it a long-term investment for gardeners.
Cleaning the Testing Devices
Clean the testing devices after each use to ensure accuracy and longevity. Use distilled water and a soft‚ lint-free cloth to gently wipe away any soil residue. Avoid using harsh chemicals or abrasive materials‚ as they may damage the devices or affect future test results. For stubborn stains‚ lightly dampen the cloth with water‚ but ensure no excess moisture remains. Allow the devices to air-dry completely before storing them in the kit. Regular cleaning prevents contamination and maintains the reliability of the tests. Properly cleaned devices will provide consistent and accurate readings‚ ensuring your soil testing remains effective and trustworthy for future use.
Replacing Expired or Damaged Components
Regularly inspect the components of your Rapitest Soil Test Kit for signs of expiration or damage. Test capsules and color comparator charts may degrade over time‚ affecting accuracy. Replace expired capsules as indicated by the manufacturer’s guidelines‚ and ensure damaged charts are substituted to maintain reliable results. If any part is compromised‚ refer to the kit’s instructions or the manufacturer’s website for replacement options. Properly dispose of expired or damaged items to prevent contamination. Replacing components ensures consistent and accurate soil testing‚ helping you maintain optimal soil health for your garden. Always follow the manufacturer’s recommendations for sourcing replacement parts to guarantee compatibility and performance.

Troubleshooting Common Issues
Common issues include inaccurate results‚ color comparator mismatches‚ or inconsistent soil samples. Recheck testing procedures‚ ensure samples are representative‚ and verify kit components are undamaged for accurate outcomes.
Why Your Test Results Might Be Inaccurate
Inaccurate test results with the Rapitest Soil Test Kit can occur due to several factors. Expired or damaged components‚ such as outdated testing capsules‚ may not provide reliable readings. Additionally‚ improper soil sample preparation‚ like using distilled water instead of tap water‚ can skew results. Failure to follow the instructions precisely‚ such as not mixing the soil sample thoroughly or not waiting the recommended time for color changes‚ can also lead to inaccuracies. Lastly‚ contamination of the sample or using soil that is not representative of your garden bed can affect the reliability of the test outcomes. Always ensure proper kit maintenance and adherence to the provided guidelines to achieve accurate results.
Resolving Issues with Color Comparators
Color comparators in the Rapitest Soil Test Kit may occasionally present challenges. If the color does not develop clearly‚ ensure the testing capsules are not expired and are used correctly. Clean the comparators regularly with distilled water to remove any residue that might interfere with color accuracy. If the colors appear inconsistent‚ compare them under natural light for better visibility. Always refer to the enclosed chart for accurate color matching. If issues persist‚ consider replacing the comparators or consulting the kit’s troubleshooting guide. Proper care and adherence to instructions will help maintain the effectiveness of the color comparators and ensure reliable test results for optimal soil management.
Dealing with Inconsistent Soil Samples
Inconsistent soil samples can lead to unreliable test results. To address this‚ collect samples from multiple locations in your garden to ensure a representative average. Mix the samples thoroughly and allow them to air-dry before testing. Avoid using soil that is excessively wet or contaminated with debris‚ as this can skew results. If inconsistency persists‚ check that you are following the kit’s instructions for sample preparation‚ including proper drying and sieving. Ensure all tests are conducted under consistent conditions‚ such as using room-temperature water and avoiding direct sunlight. By standardizing your sampling and testing process‚ you can achieve more accurate and reliable results for better soil management.
Additional Resources
For further learning‚ visit the official Luster Leaf website or Gardenerd for detailed tutorials. Online forums and gardening communities also offer valuable insights and troubleshooting tips.
Where to Find More Information
For comprehensive guidance on using the Rapitest Soil Test Kit‚ visit the official Luster Leaf website‚ which offers detailed instructions‚ FAQs‚ and video tutorials. Additionally‚ online forums like GardenWeb and Reddit’s r/gardening provide valuable insights and troubleshooting tips from experienced gardeners. Educational resources from Cooperative Extension offices and specialized gardening blogs offer in-depth guides and scientific approaches to soil testing. YouTube channels such as “Gardenerd” and “The Rusted Garden” feature video demonstrations that complement the kit’s instructions. By exploring these resources‚ gardeners can enhance their understanding and effectively utilize the Rapitest Soil Test Kit for optimal soil health.
Recommended Reading for Soil Health
To deepen your understanding of soil health and testing‚ consider reading “The New Seed Starter’s Handbook” by Nancy Bubel‚ which covers soil preparation and testing basics. “The Vegetable Gardener’s Bible” by Edward C. Smith offers practical advice on soil management. For a scientific perspective‚ “The Soil Will Save Us” by Kristin Ohlson explores soil’s role in agriculture. These books provide complementary knowledge to the Rapitest Soil Test Kit‚ helping you interpret results and implement effective soil care strategies. They are available on platforms like Amazon‚ Barnes & Noble‚ and local libraries‚ ensuring easy access to expert guidance for gardeners of all levels.
Online Communities for Gardeners
Gardeners can benefit from joining online communities like Reddit’s r/gardening and r/soiltesting‚ where enthusiasts share tips and experiences. Facebook groups such as “Gardening Enthusiasts” and “Soil Testing for Gardeners” offer platforms to discuss soil health and test results. Specialized forums like GardenWeb and Gardener’s Forum provide in-depth discussions on optimizing soil conditions. These communities are invaluable for learning how to interpret Rapitest results‚ troubleshoot common issues‚ and implement effective soil care strategies. By engaging with these groups‚ gardeners can gain insights and advice from experienced growers‚ helping them maximize their use of the Rapitest Soil Test Kit and achieve better gardening outcomes.
The Rapitest Soil Test Kit is a user-friendly tool that empowers gardeners to optimize soil conditions‚ ensuring healthier plants and thriving gardens through accurate‚ easy-to-understand results.
Final Tips for Using the Rapitest Soil Test Kit
For optimal results‚ always follow the kit’s instructions carefully and ensure soil samples are representative of your garden. Avoid contaminated or waterlogged samples for accurate readings. Regular testing helps monitor soil health and track improvements over time. Use the pH preference list to select plants that thrive in your soil conditions. Store the kit properly to maintain the integrity of the components. Clean testing devices after each use to prevent cross-contamination. Replace expired reagents promptly to ensure reliability. By adhering to these guidelines‚ you can maximize the effectiveness of the Rapitest Soil Test Kit and create a balanced‚ thriving garden ecosystem.